A properly installed furnace isn’t just about staying warm—it’s about saving money and ensuring long-term safety. A poorly installed system can lead to energy inefficiency, higher utility bills, and even potential hazards like carbon monoxide leaks. This is why working with a qualified HVAC professional is crucial for a successful installation.
Preparing for Furnace Installation
Before the installation begins, there are a few things you’ll need to prepare:
Schedule a Consultation: An HVAC professional will inspect your home to determine the right furnace size and type for your needs. This step ensures the system can heat your entire space efficiently.
Clear the Area: Make sure the installation area is clean and accessible for technicians. This might involve moving furniture or clearing storage in your furnace room.
Ask Questions: Don’t hesitate to discuss your expectations, maintenance needs, and any concerns with your HVAC team during the consultation.
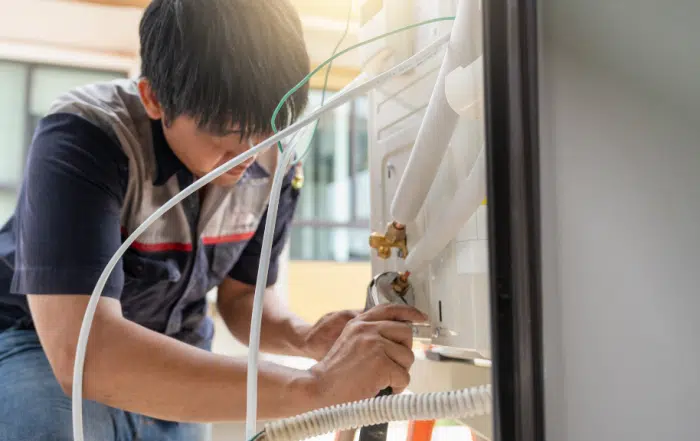
The Furnace Installation Process
Here’s a general step-by-step outline of the furnace installation process:
1. Removal of the Old System
If you’re replacing an existing furnace, the technicians will begin by disconnecting and safely removing the old system. This includes disconnecting gas lines, electrical wiring, and ductwork where applicable. Proper disposal of the old furnace will often be included in the service.
2. Installing the New Furnace
Once the old system is removed, the new furnace is expertly positioned. Skilled technicians will connect the unit to your ductwork, gas lines, and power supply. This stage requires great precision to ensure there are no air leaks or connection issues.
3. Calibrating and Testing
After installation, your technician will calibrate the furnace’s thermostat and test the entire system to ensure it’s working correctly. This step includes checking airflows, evaluating efficiency, and ensuring safety features like carbon monoxide detectors and automatic shut-offs are functioning.
4. Explaining Maintenance Tips
Your HVAC professional will walk you through everything you need to know about maintaining your new system. This includes setting thermostat schedules, replacing filters, and troubleshooting basic problems.
")
How Long Does Furnace Installation Take?
A typical furnace installation takes anywhere from 4 to 8 hours, depending on the complexity of the job and whether ductwork modifications are needed. If additional upgrades are requested, such as installing a smart thermostat, this might add extra time.
Pro Tips for a Smooth Installation
- Ask About Permits: Some municipalities require permits for HVAC installations. Fortunately, most professionals will handle this for you.
- Upgrade While You Can: Consider replacing old thermostats or adding air purification systems during installation. It’s often easier to bundle these upgrades.
- Plan for Post-Installation Maintenance: Schedule a follow-up service within the first year to ensure your system remains in peak condition.
Furnace installation doesn’t need to be daunting. By understanding the process and working with a qualified HVAC professional, you can ensure your home stays warm and energy-efficient all winter long.
For more home heating tips and insider HVAC tips, check out our other blog posts!